
Elirox Help Center
How to Verify Your Exness Account (KYC Guide)
Exness requires every trader to complete identity verification, known as KYC (Know Your Customer), before they can deposit, trade, and withdraw funds without restrictions. Verification happens in two stages.
The first stage, Standard Verification, is quick and lets you deposit up to $2,000. The second stage, Extended Verification, removes that cap and unlocks higher deposit and withdrawal limits. This guide walks you through both stages, step by step.
Part 1: Standard Verification (deposits up to $2,000)
Standard Verification confirms your contact details and basic profile. Most traders complete it in a few minutes.
1. Log in and start verification
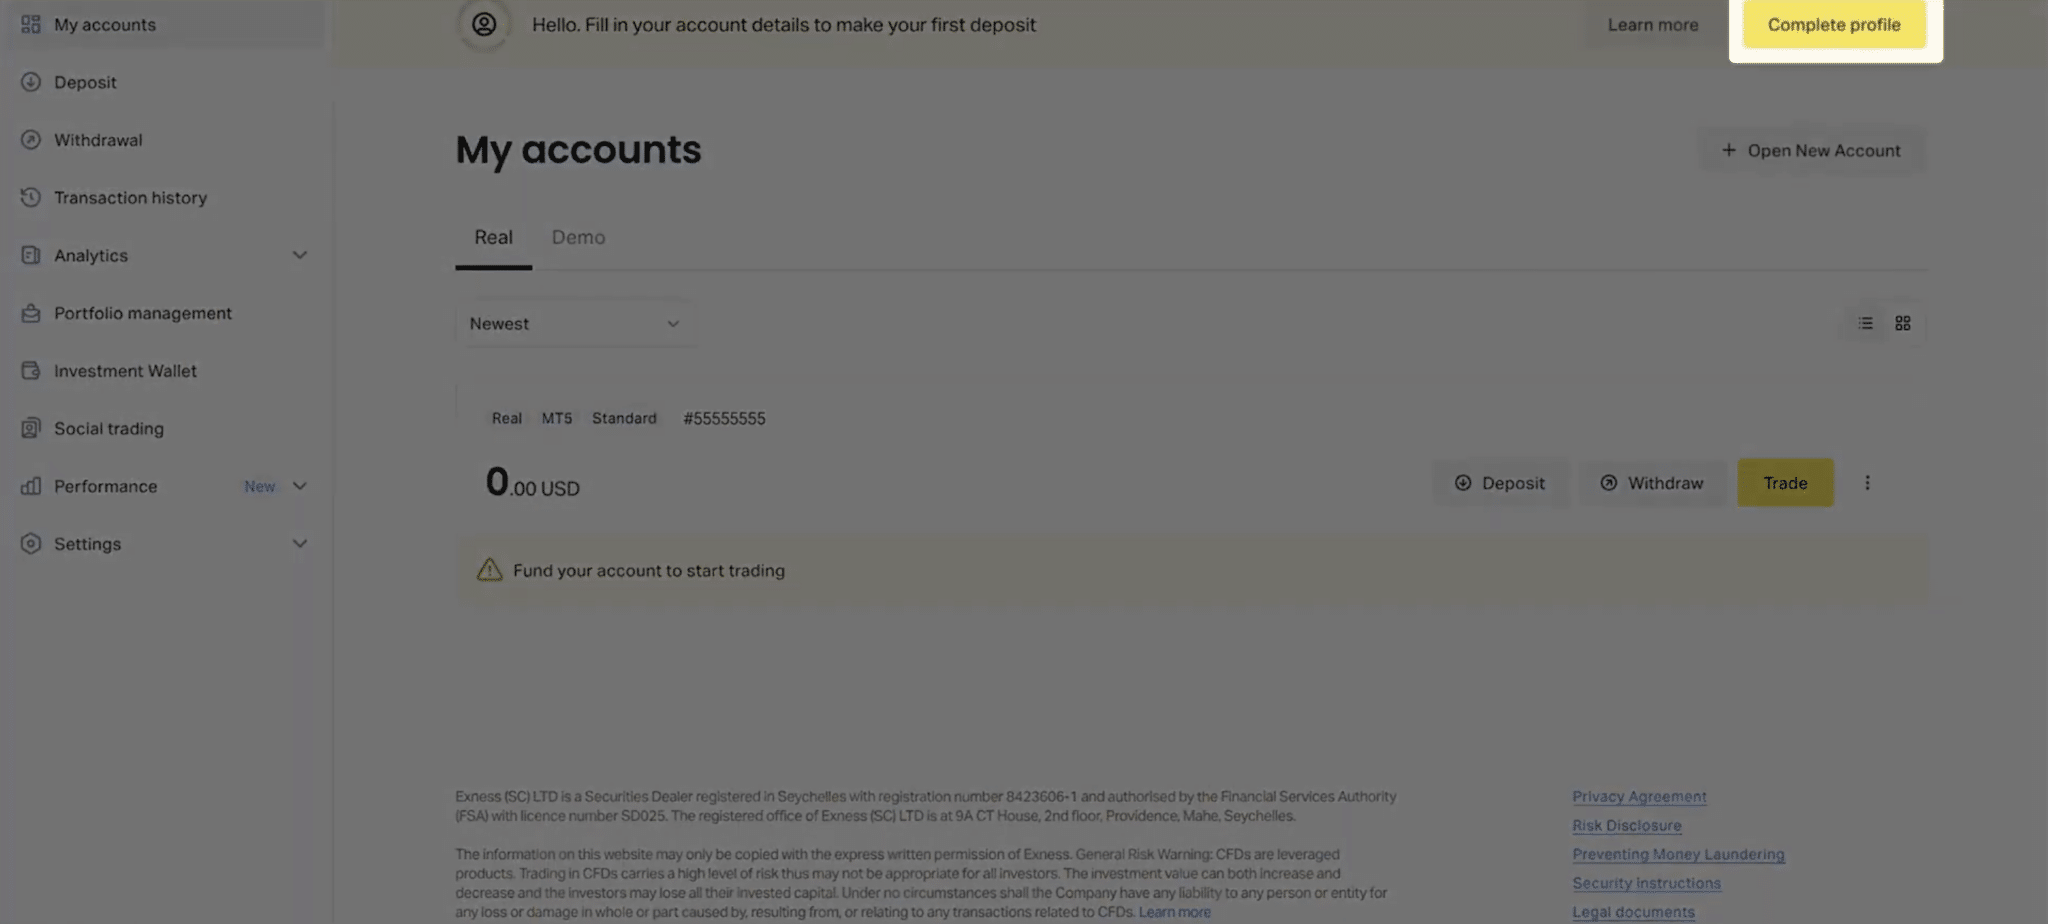
Log in to your Exness Personal Area and click Complete Profile, or select the verification banner on your dashboard. A pop-up outlines the steps ahead. Click Continue to begin.
2. Confirm your email address
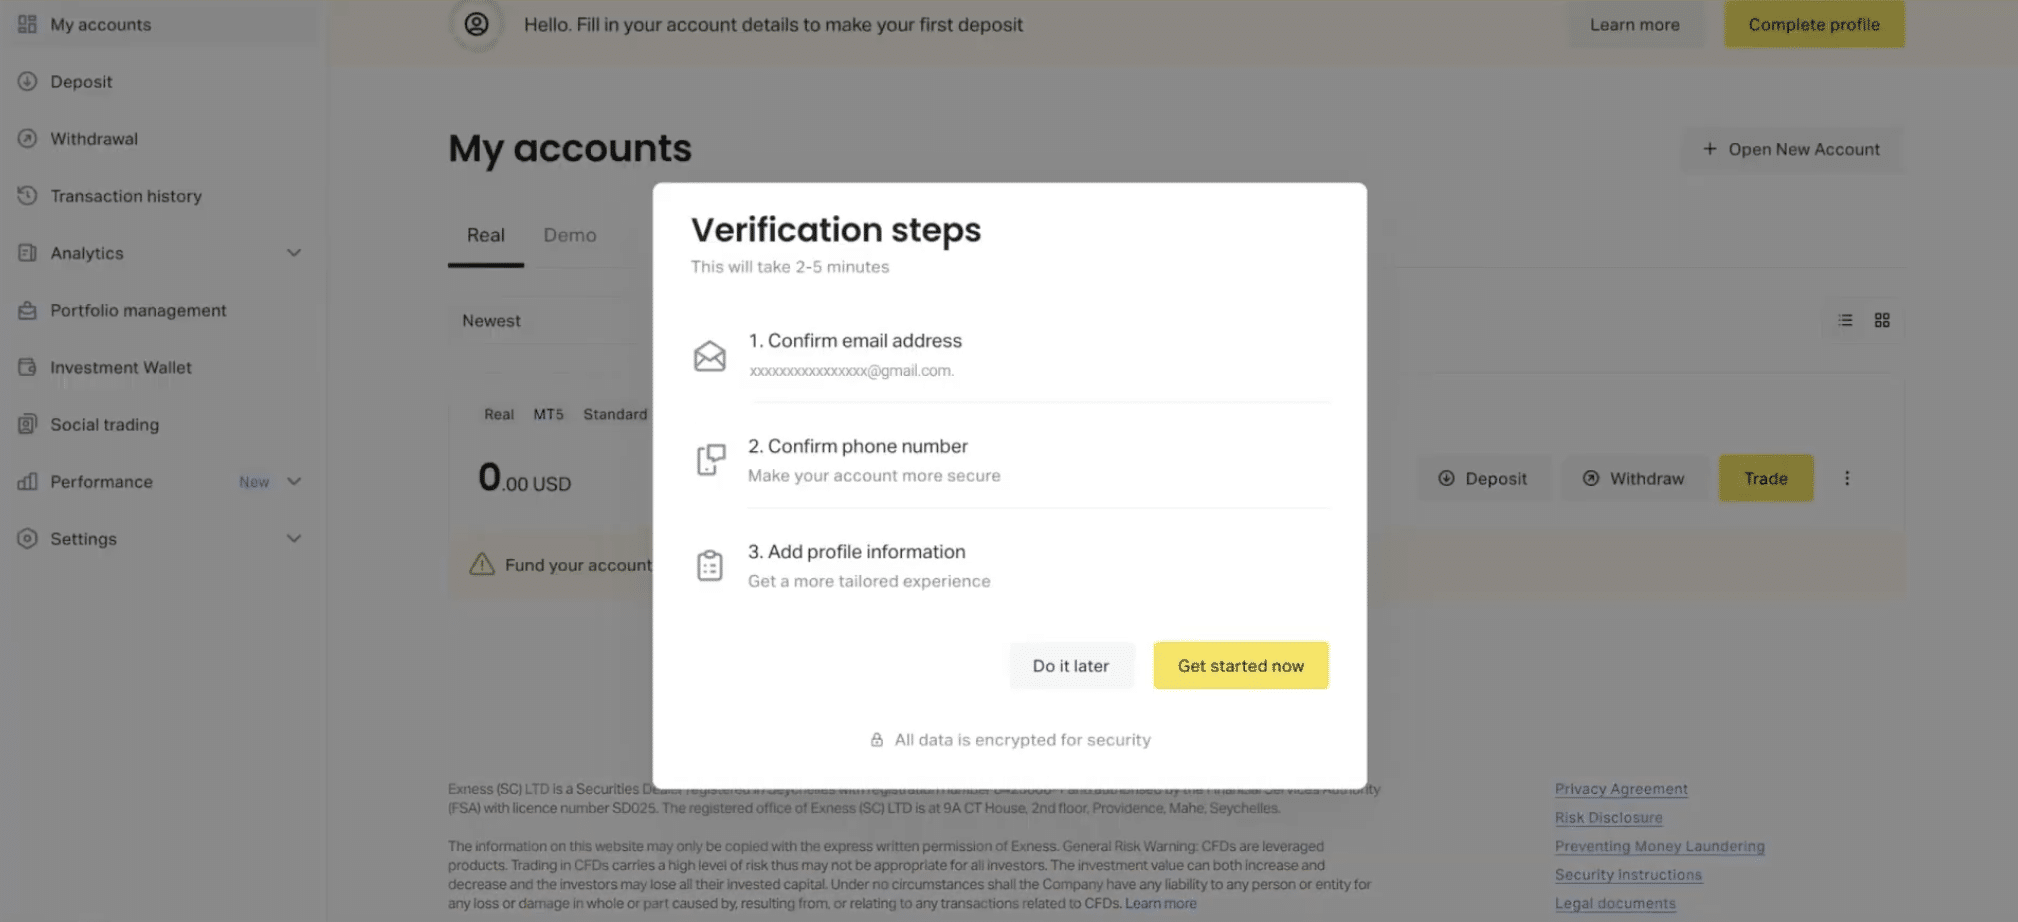
Exness will prompt you to confirm the data. Press Get started now. The platform will send a confirmation code to the email address linked to your account. Enter the code and click Continue.
3. Verify your phone number
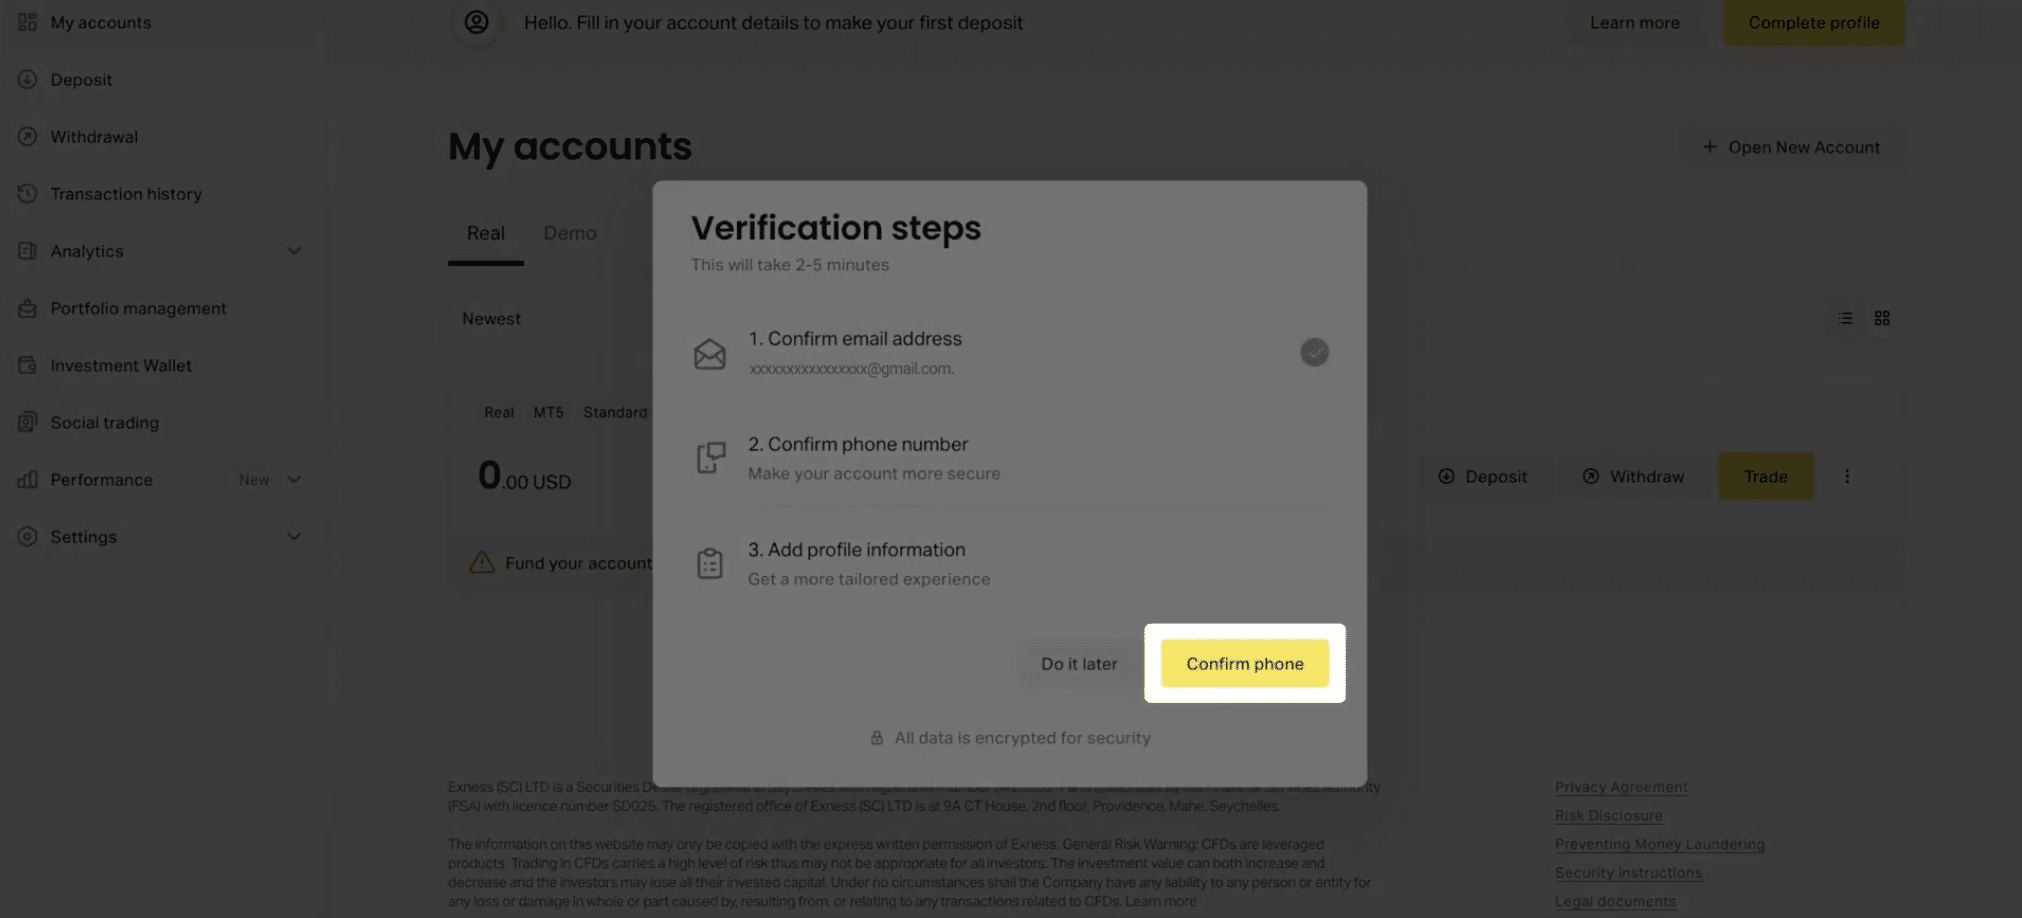
Select Confirm Phone, enter your mobile number, and choose to receive your code by SMS or phone call. Enter the code you receive and click Continue.
4. Complete your profile information
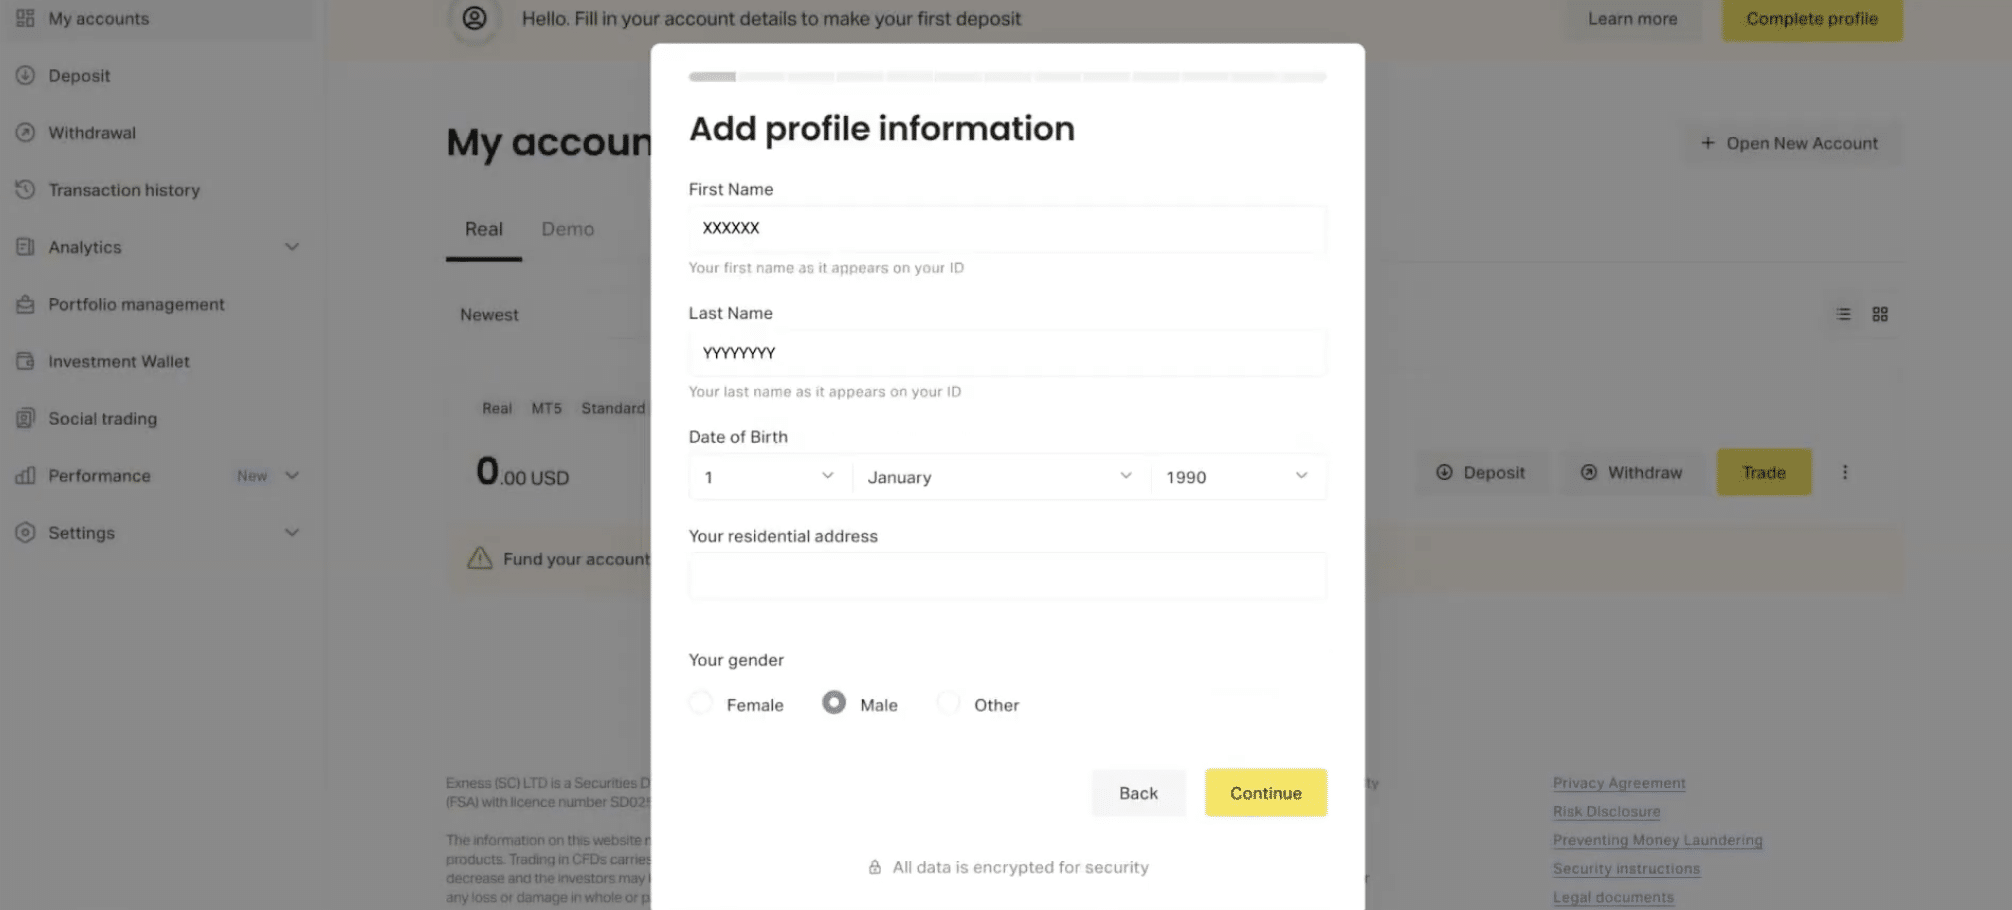
Fill in your personal details, including your full legal name, date of birth, address, and country of residence. Make sure your name matches your identity documents exactly, since this saves time at the next stage.
You’ll also complete a short survey about your trading experience and financial background.
5. Save your profile
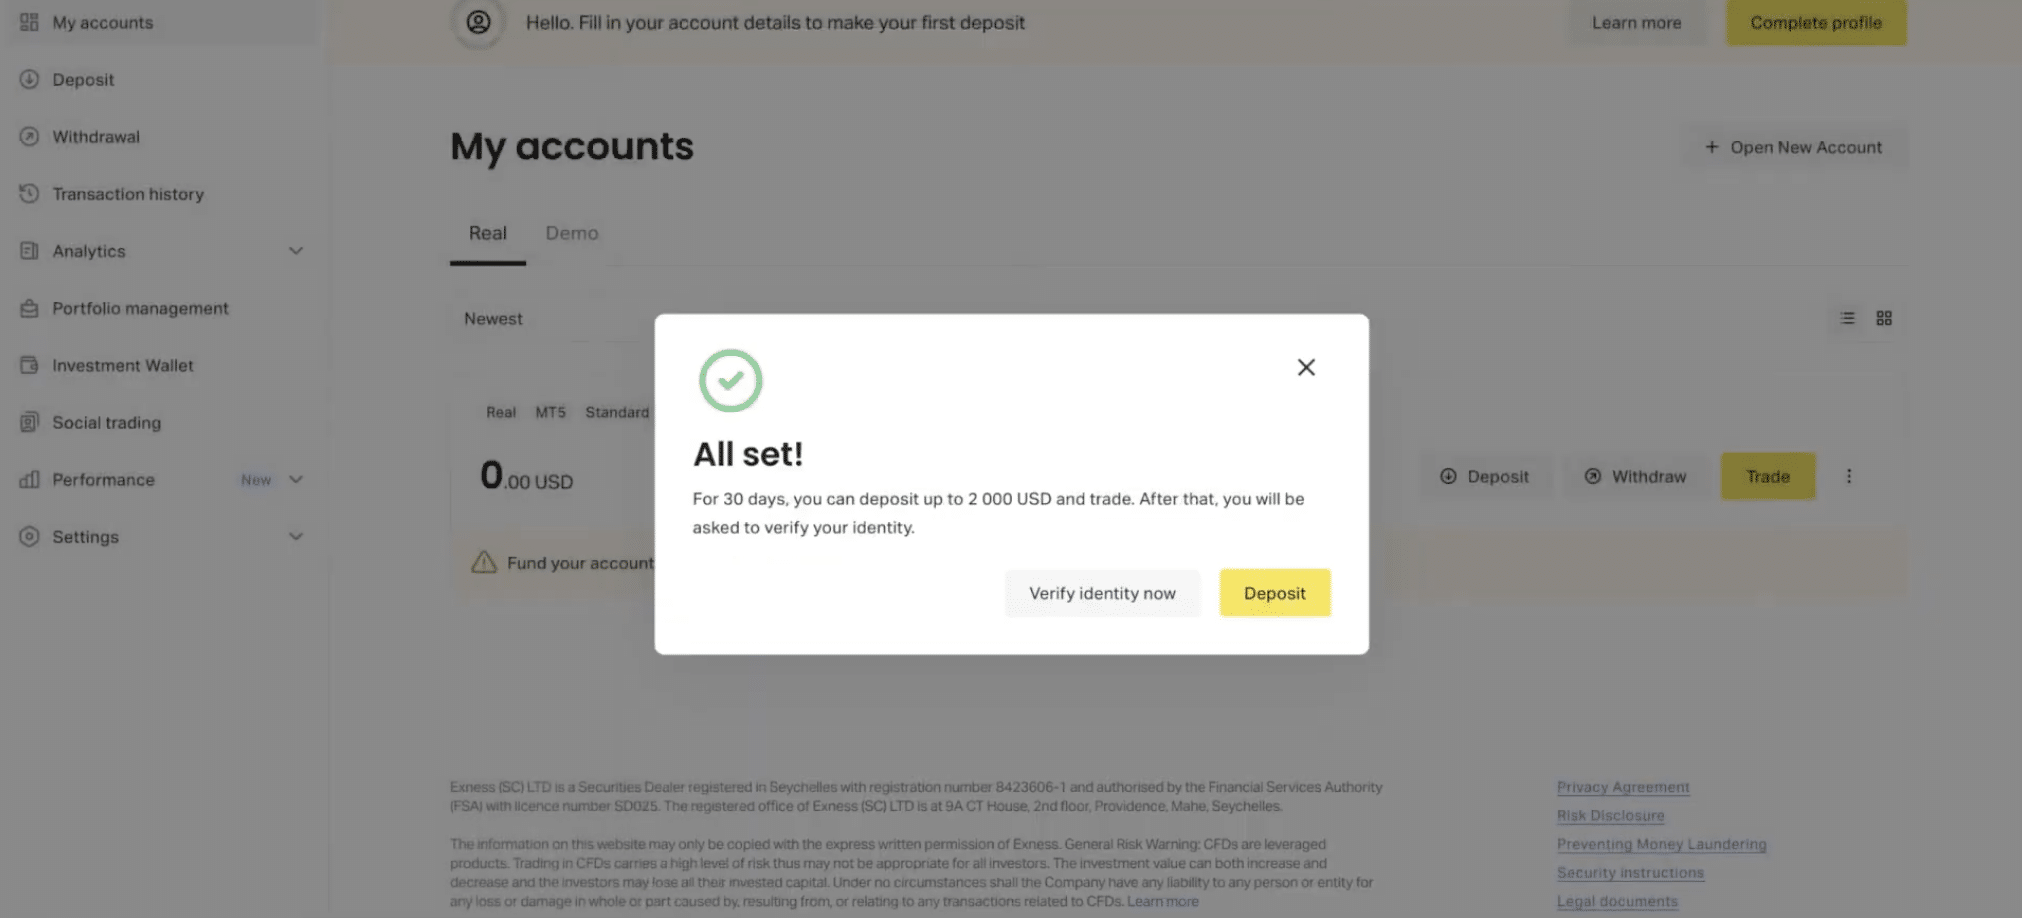
Click Confirm to save your information. A confirmation message appears, along with your new deposit limit.
Your account is now Standard Verified. You can deposit up to $2,000 and start trading.
Part 2: Extended Verification (higher deposit and withdrawal limits)
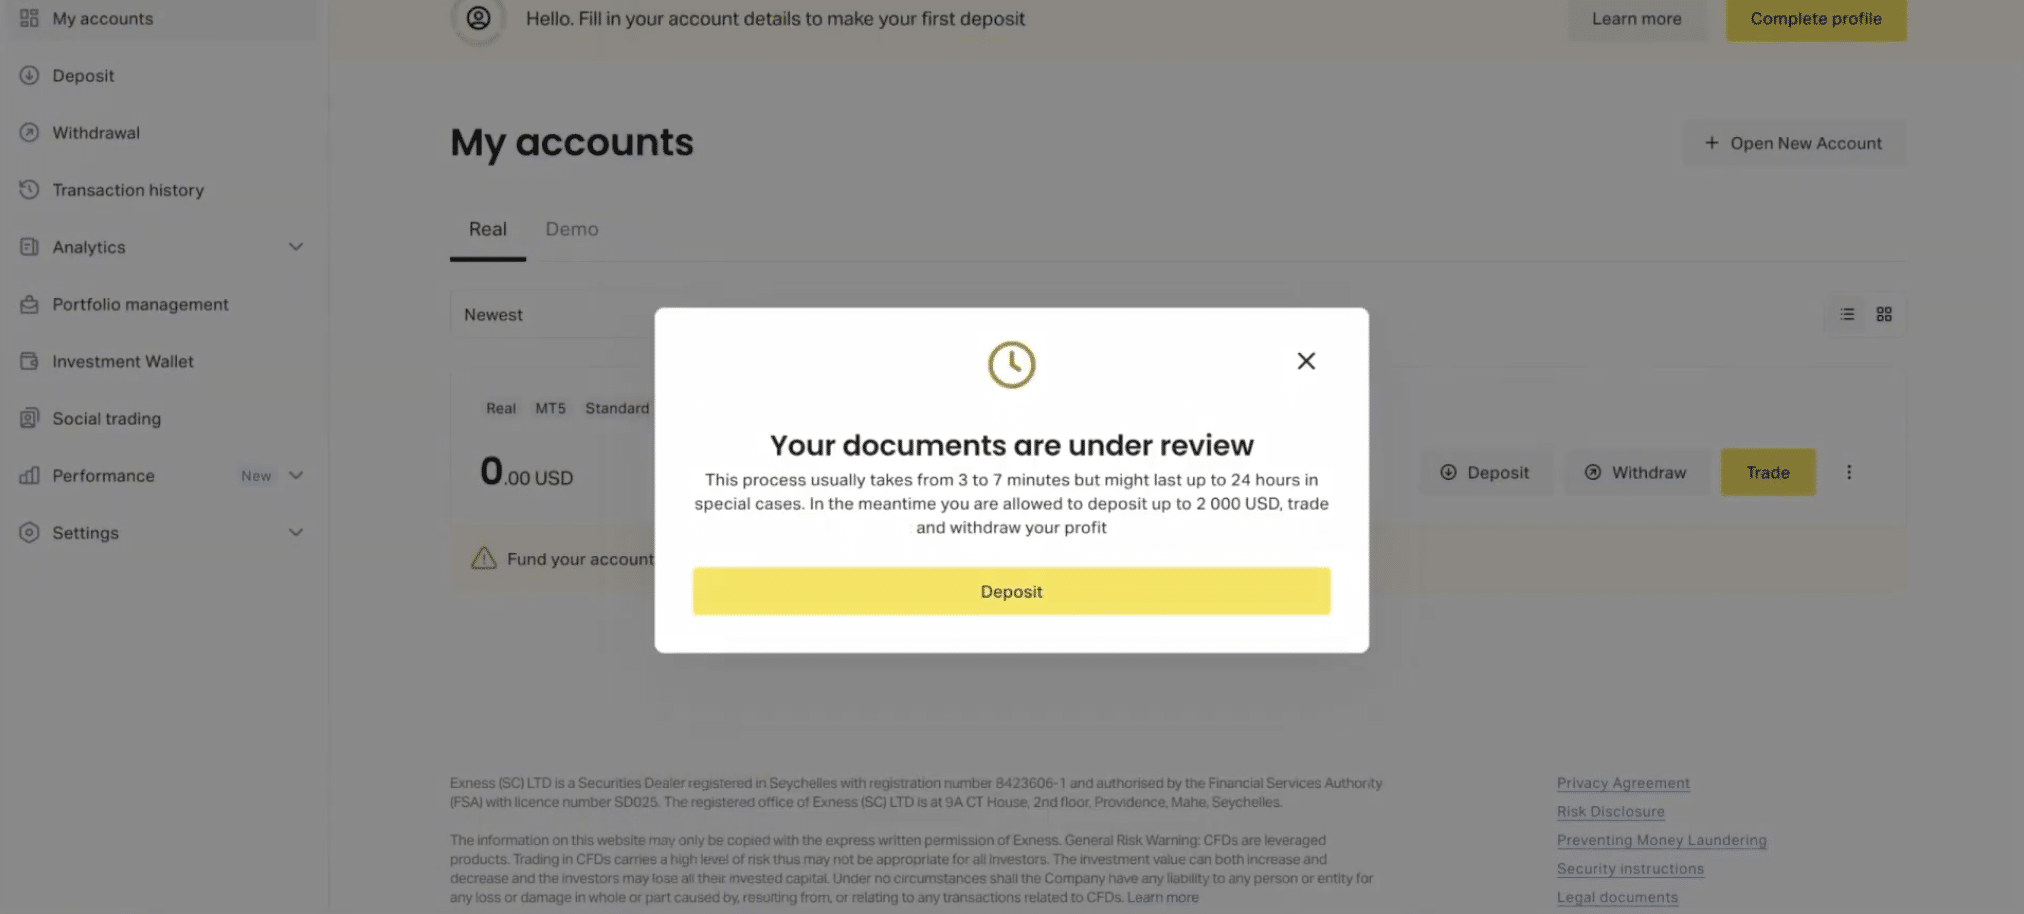
Extended Verification removes the $2,000 cap. It adds two document checks: Proof of Identity and Proof of Address. Approval usually takes up to 24 hours.
6. Start identity verification
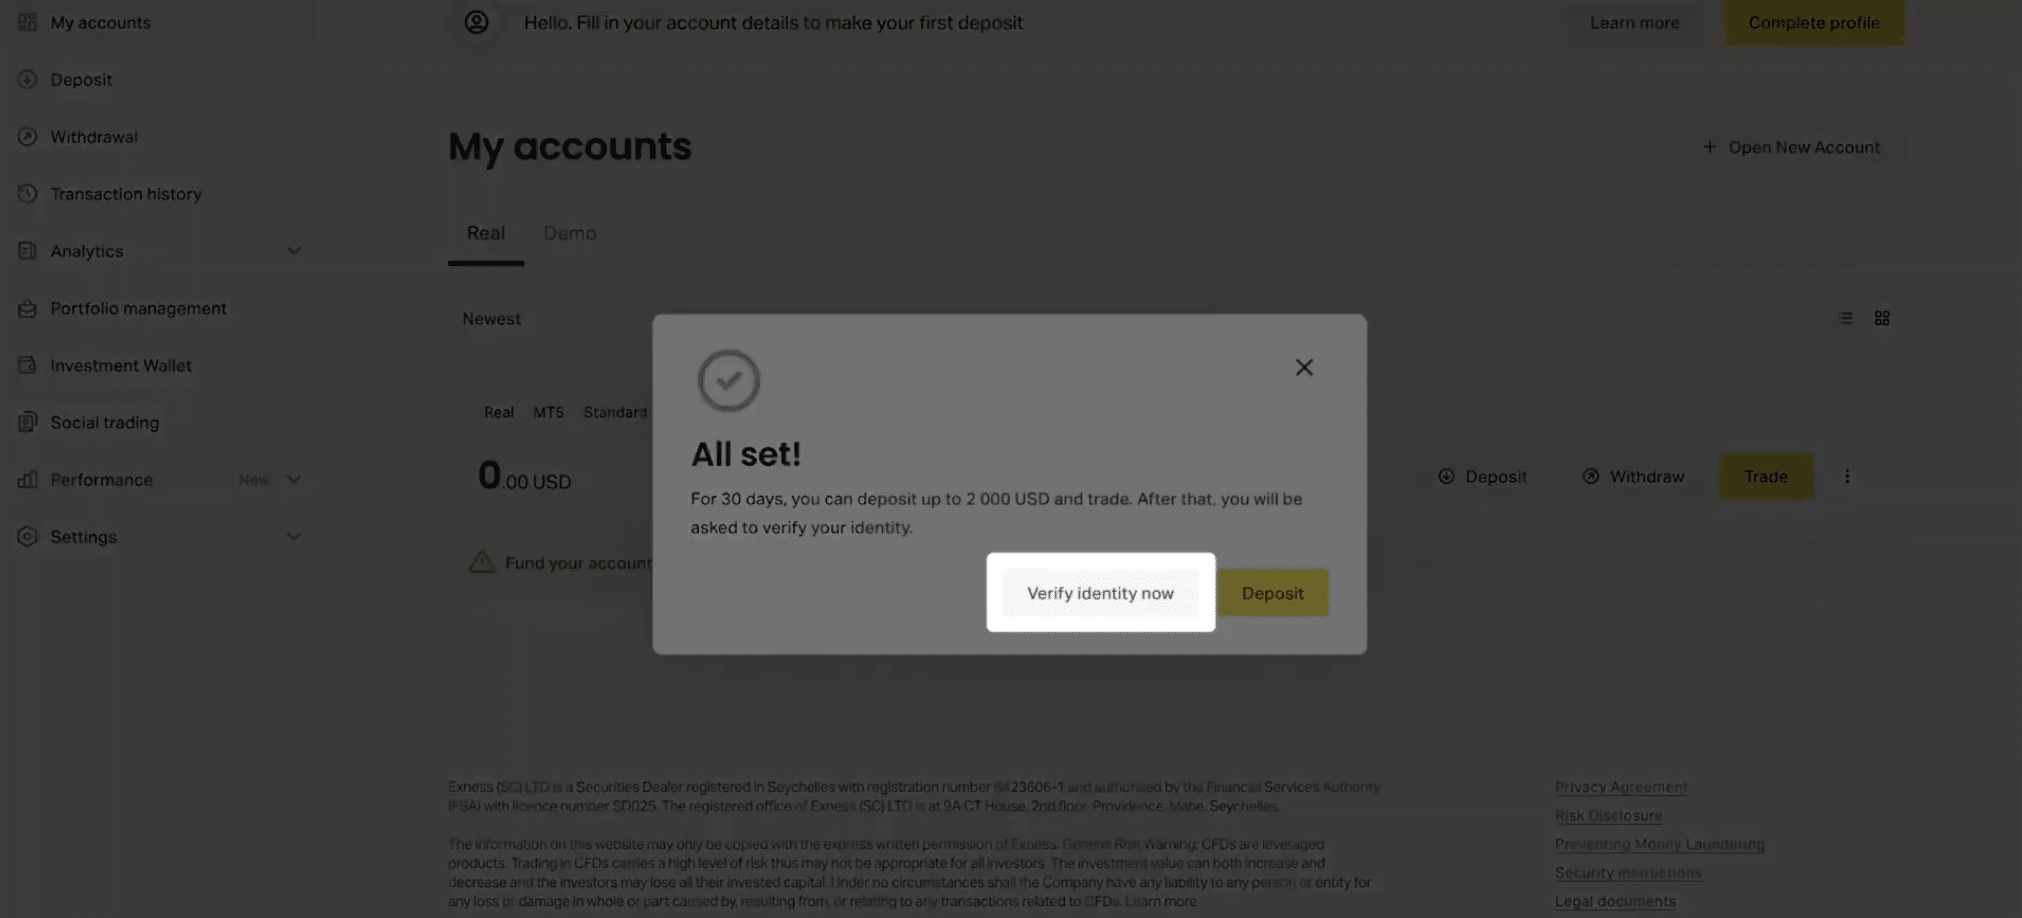
From your Personal Area, click Verify identity now. Confirm that your name matches the documents you’re about to upload, then confirm that you are not a citizen or resident of the United States.
7. Choose your document type and country
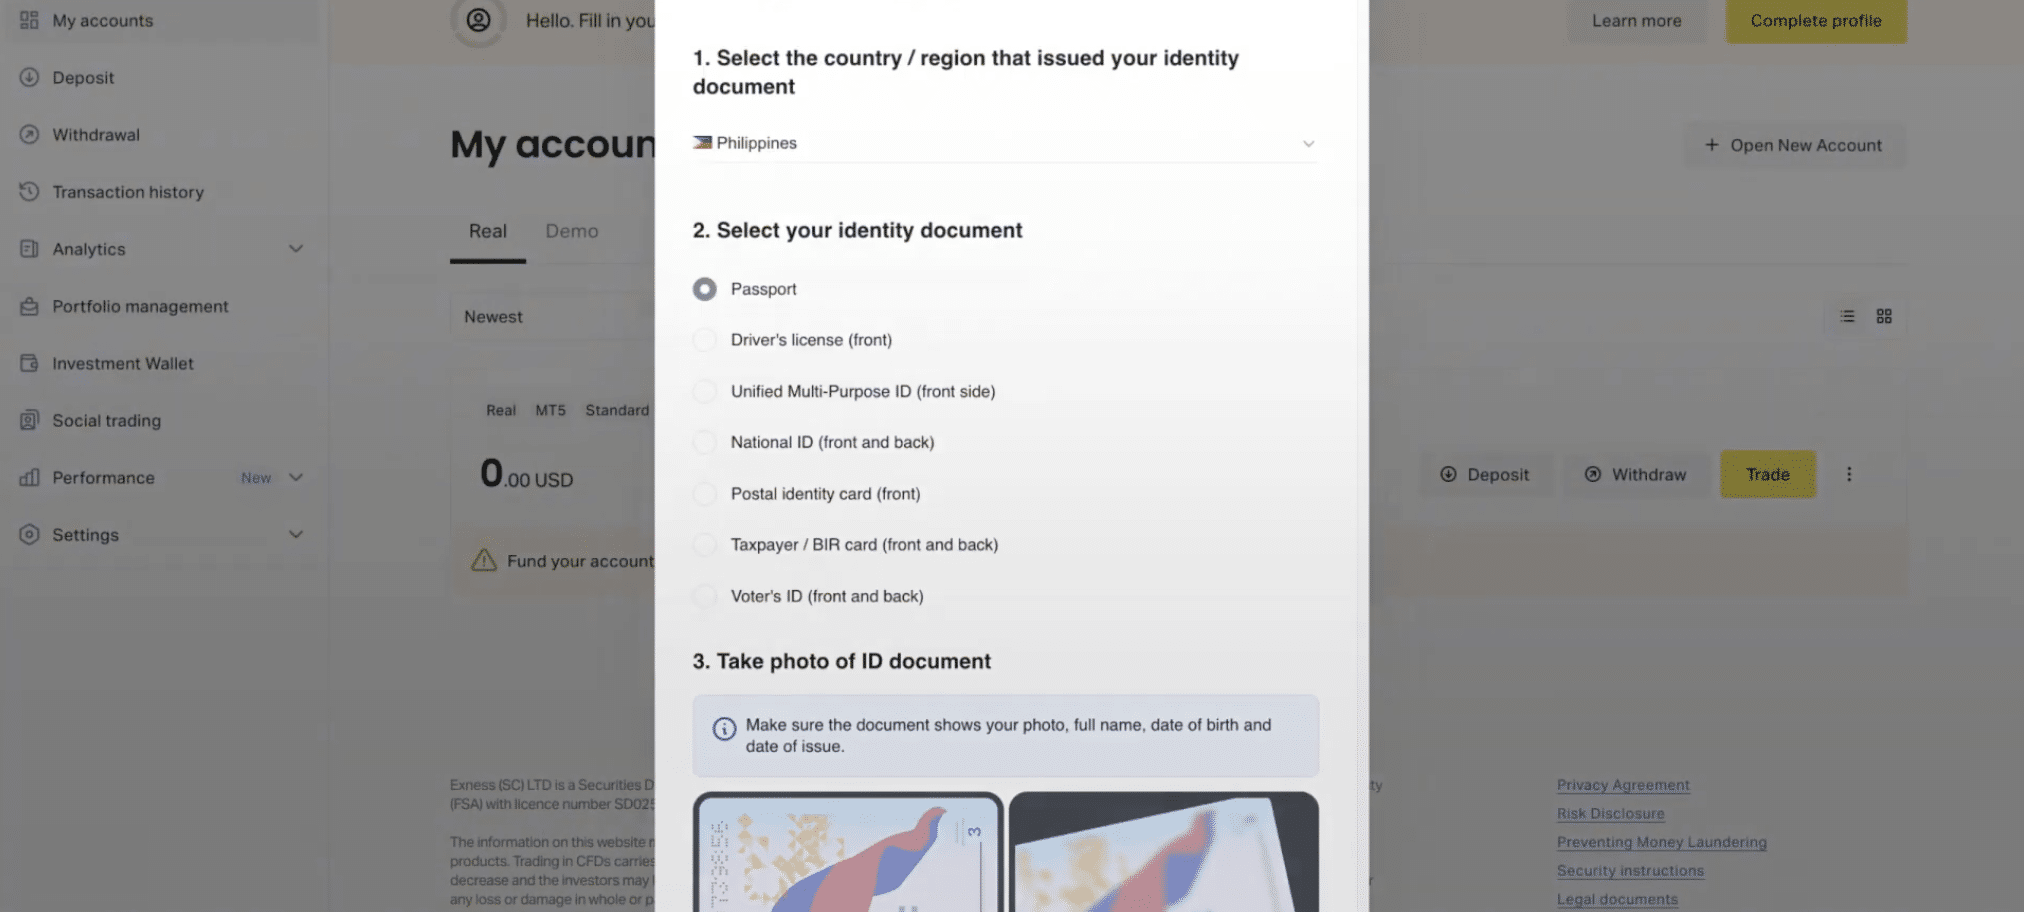
Select your country of issue and the type of document you want to upload: passport, national ID, or driver’s license.
8. Upload your document and submit
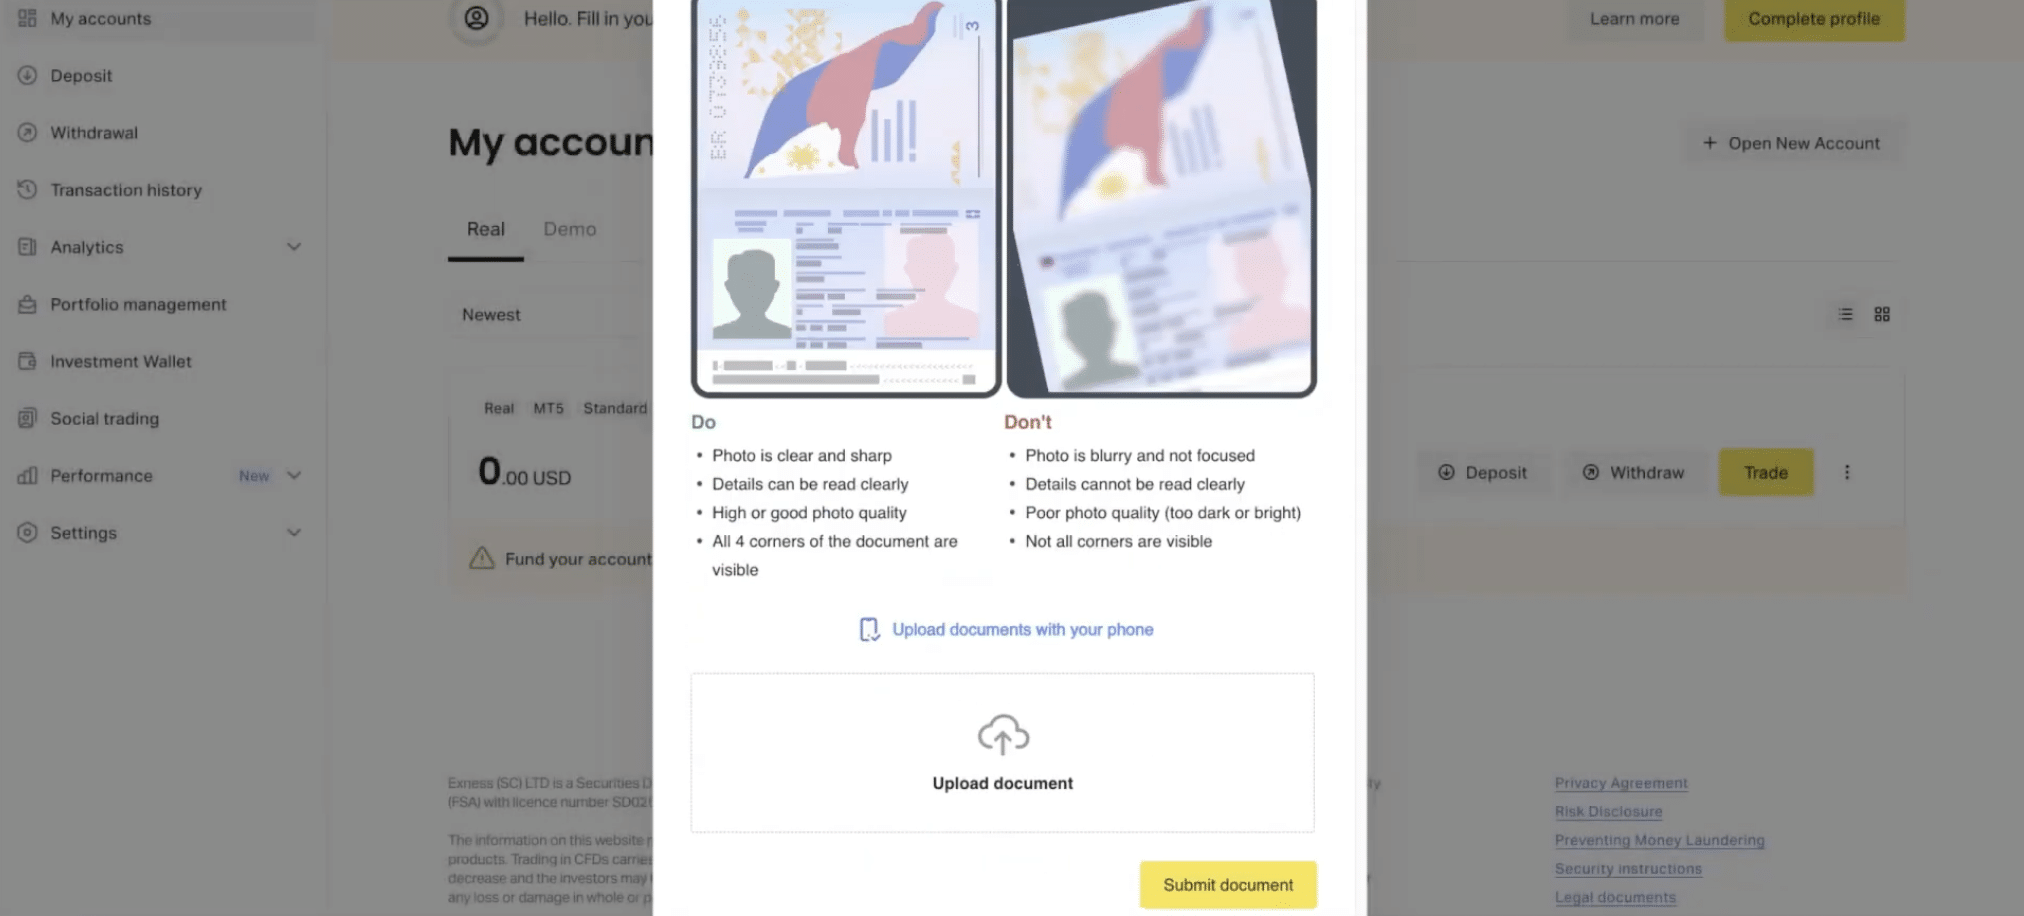
Before uploading, check the list of dos and don’ts Exness displays. Attach your document and click Submit. In some countries, one document can cover both identity and address verification. In most countries, you’ll need a separate document for each.
9. Submit Proof of Address (if required)
If identity and address verification aren’t combined, return to your Personal Area once your ID is approved and submit Complete profile. This can be a recent utility bill, bank statement, or official government letter, dated within the last six months.
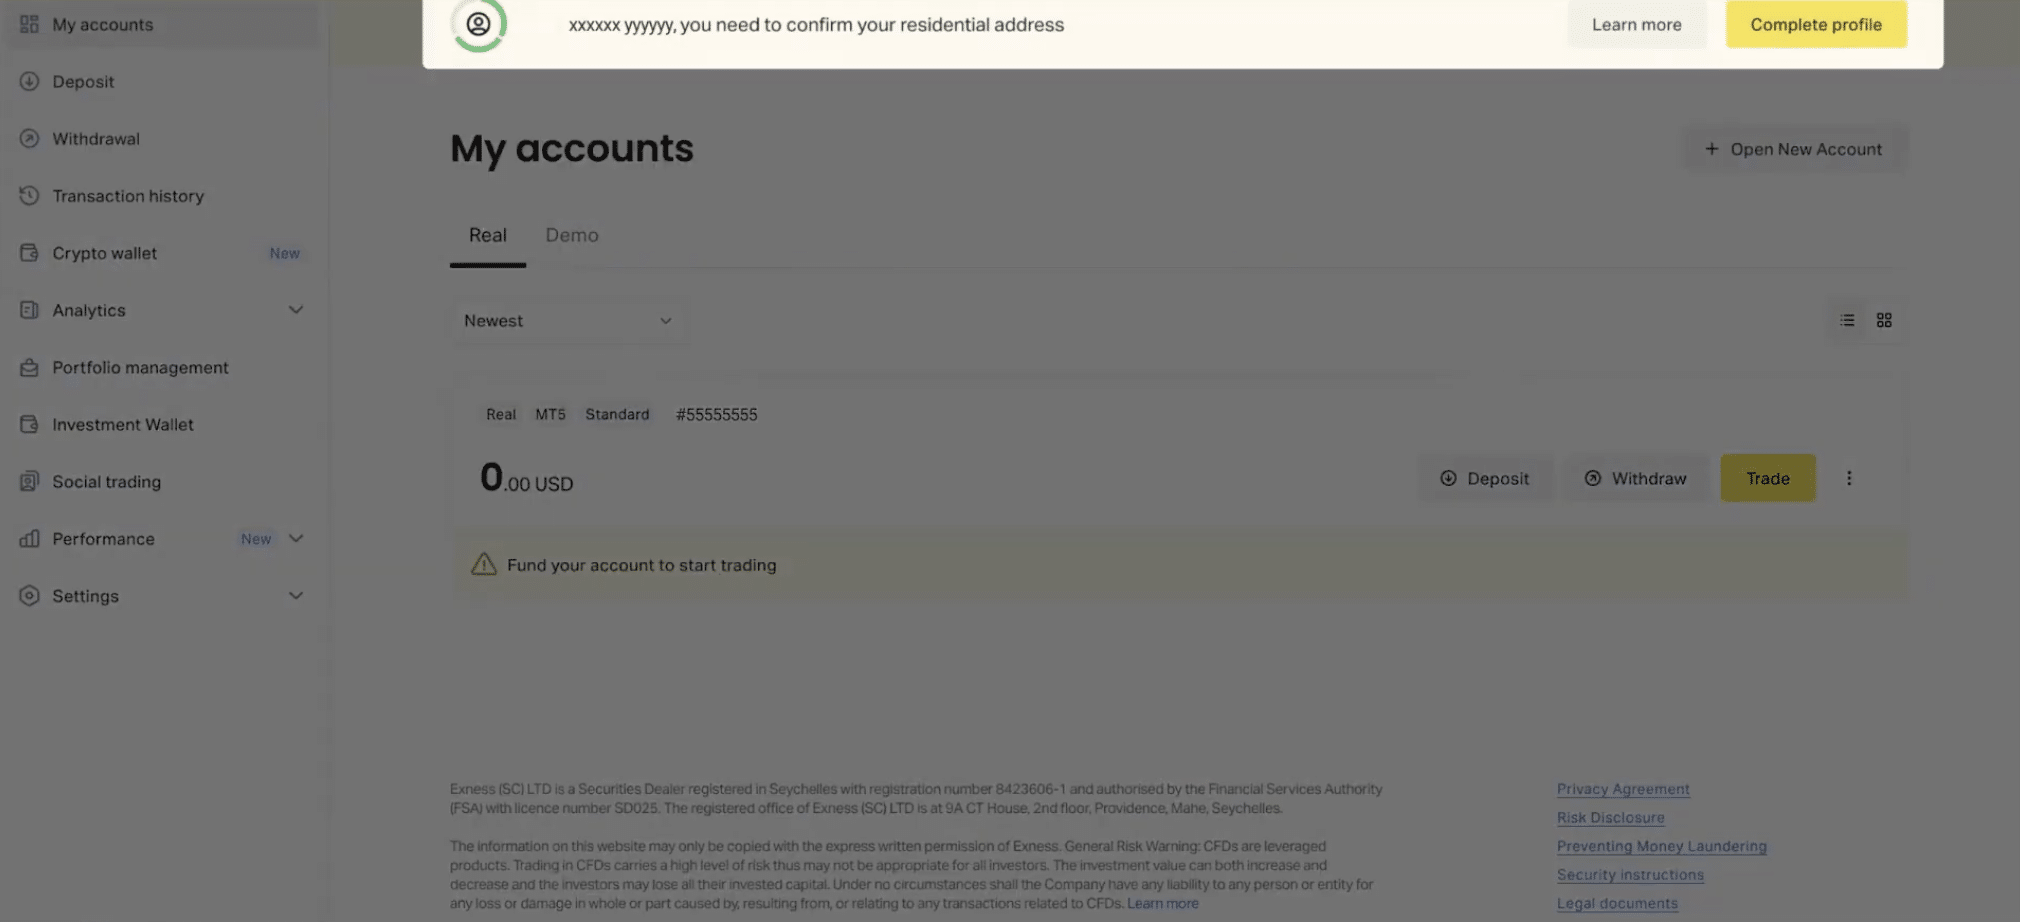
10. Wait for approval
Exness typically reviews documents within 24 hours. Once approved, your account is fully verified, and your deposit and withdrawal limits are lifted, based on what your chosen payment method allows.
Quick recap
- Confirm your email and phone number, then complete your profile. This unlocks Standard Verification and a $2,000 deposit limit.
- Upload a Proof of Identity document that matches your profile name exactly.
- Submit Proof of Address if it isn’t combined with your ID document.
- Wait up to 24 hours for Exness to review and approve your documents.
- Once approved, you’re fully verified and ready to deposit, trade, and withdraw without the $2,000 cap.